By localizing your application, you are making your application more accessible to a global audience. With help of SwiftUI framework and Xcode 13, localizing your app is not particularly difficult. But how do you do it exactly? Let's see.
Localization support in SwiftUI
Localization in SwiftUI was designed to be easy. Built-in SwiftUI views that are meant to show strings on UI, for example Text, Toggle and Picker, are using LocalizedStringKey internally when user-defined strings are passed to the view. LocalizedStringKey is a special type that signals SwiftUI to look up localized strings in your bundle by passed key.
Let's look at the Text constructor in more detail.
init(_ key: LocalizedStringKey, tableName: String? = nil, bundle: Bundle? = nil, comment: StaticString? = nil)
key: The key for a string in the table identified by tableName.
tableName: The name of the string table to search. If nil, use the table in the Localizable.strings file.
bundle: The bundle containing the strings file. If nil, use the main bundle.
comment: Contextual information about this key-value pair. Using comments is very much encouraged. It gives necessary context to the key, especially if person translating text is not developer and doesn't have access to the code. Good comments should explain where the string is visible, explain context of string and explain variable in string, if variable is used.
Localization support in custom views
This also means that when creating custom views in SwiftUI, instead of regular String, use LocalizedStringKey as parameter which will display text on screen. This will make custom view ready for localization. Example below:
/// should be avoided if possible
struct CustomView: View {

    let string: String

    var body: some View {
        Text(string)
            .padding()
    }
}

/// preferred way
struct CustomView: View {

    let localizedString: LocalizedStringKey

    var body: some View {
        Text(localizedString)
            .padding()
    }
}
Returning localized strings from functions
Sometimes UI elements show some kind of state, whether it is an enum representation or something else entirely. There is usually some kind of function or computed property which returns string. Using NSLocalizedString(key:comment:) you can make that string localizable. If you are targeting iOS 15 later, prefer using String(localized:comment:).
/// prior to iOS 15
func getLocalizedString() -> String {

    /// ... some code

    return NSLocalizedString("some string", comment: "some comment")
}

/// iOS 15 and later
func getLocalizedString() -> String {

    /// ... some code

    return String(localized: "some string", comment: "some comment")
}
Xcode workflow
Up until here we went over how to adjust code to use localized strings but how to actually add localized strings to the project? Using Xcode 13 this process is pretty straightforward. Add wanted localization to project, export localizations, localize strings, import localizations.
Adding localizations
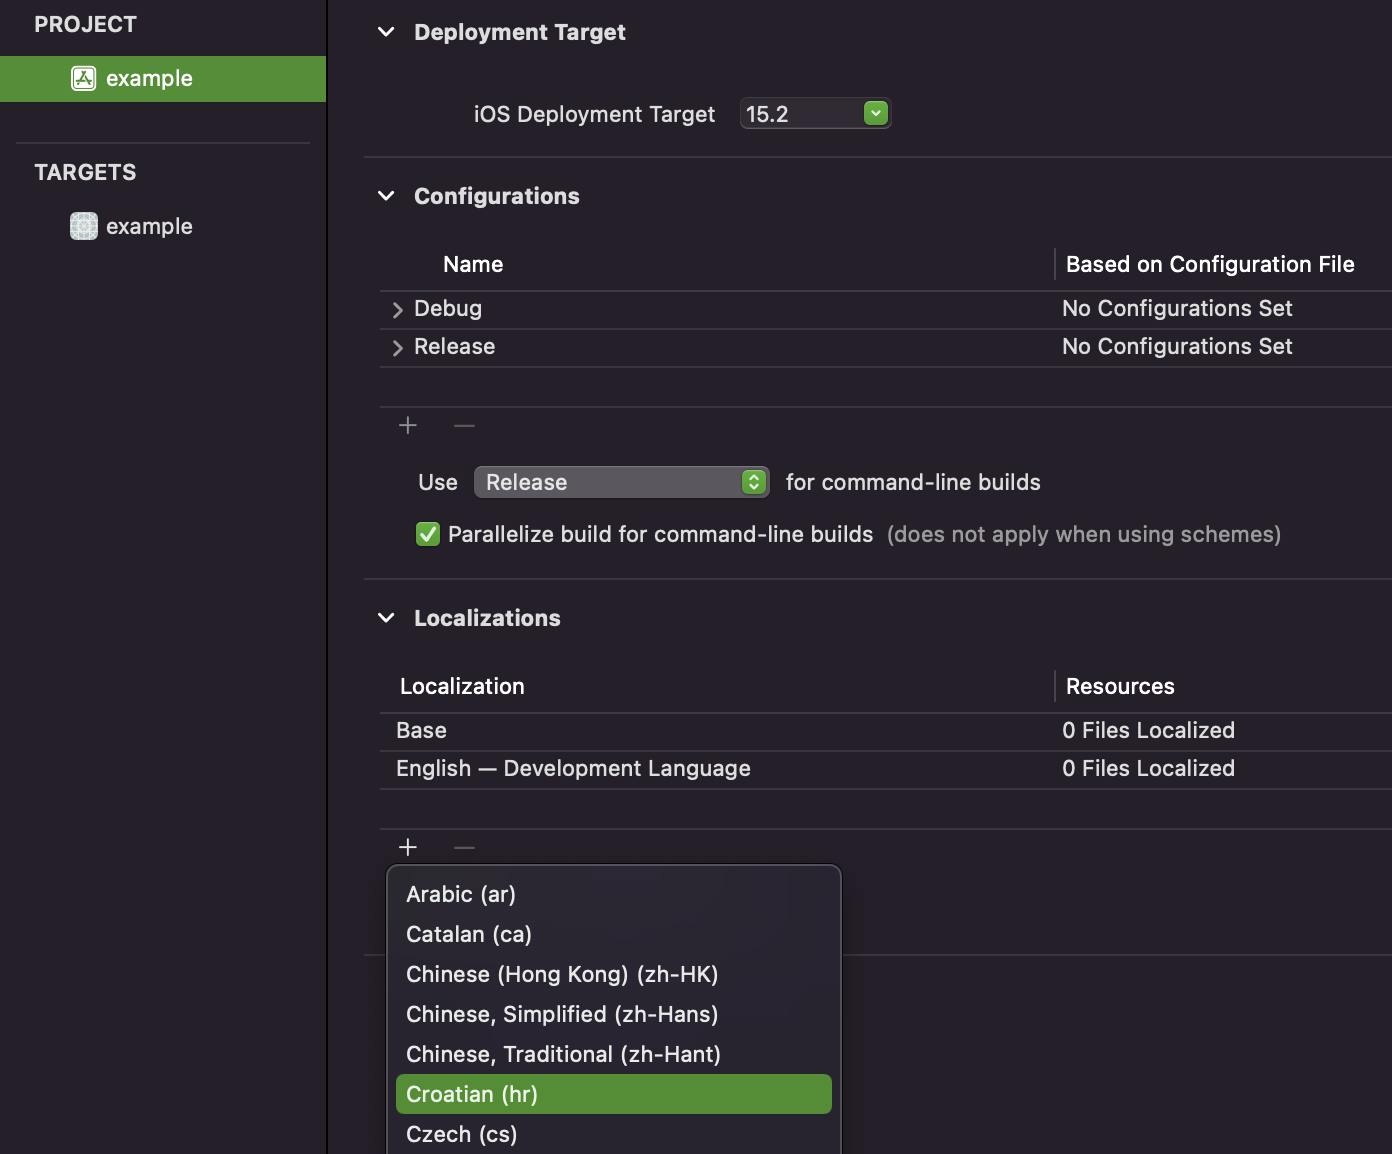
Localizations can be added to the project by opening Project configuration. Once opened, head over to Localizations section and add desired localization to the project by pressing + sign.

Exporting Localizations
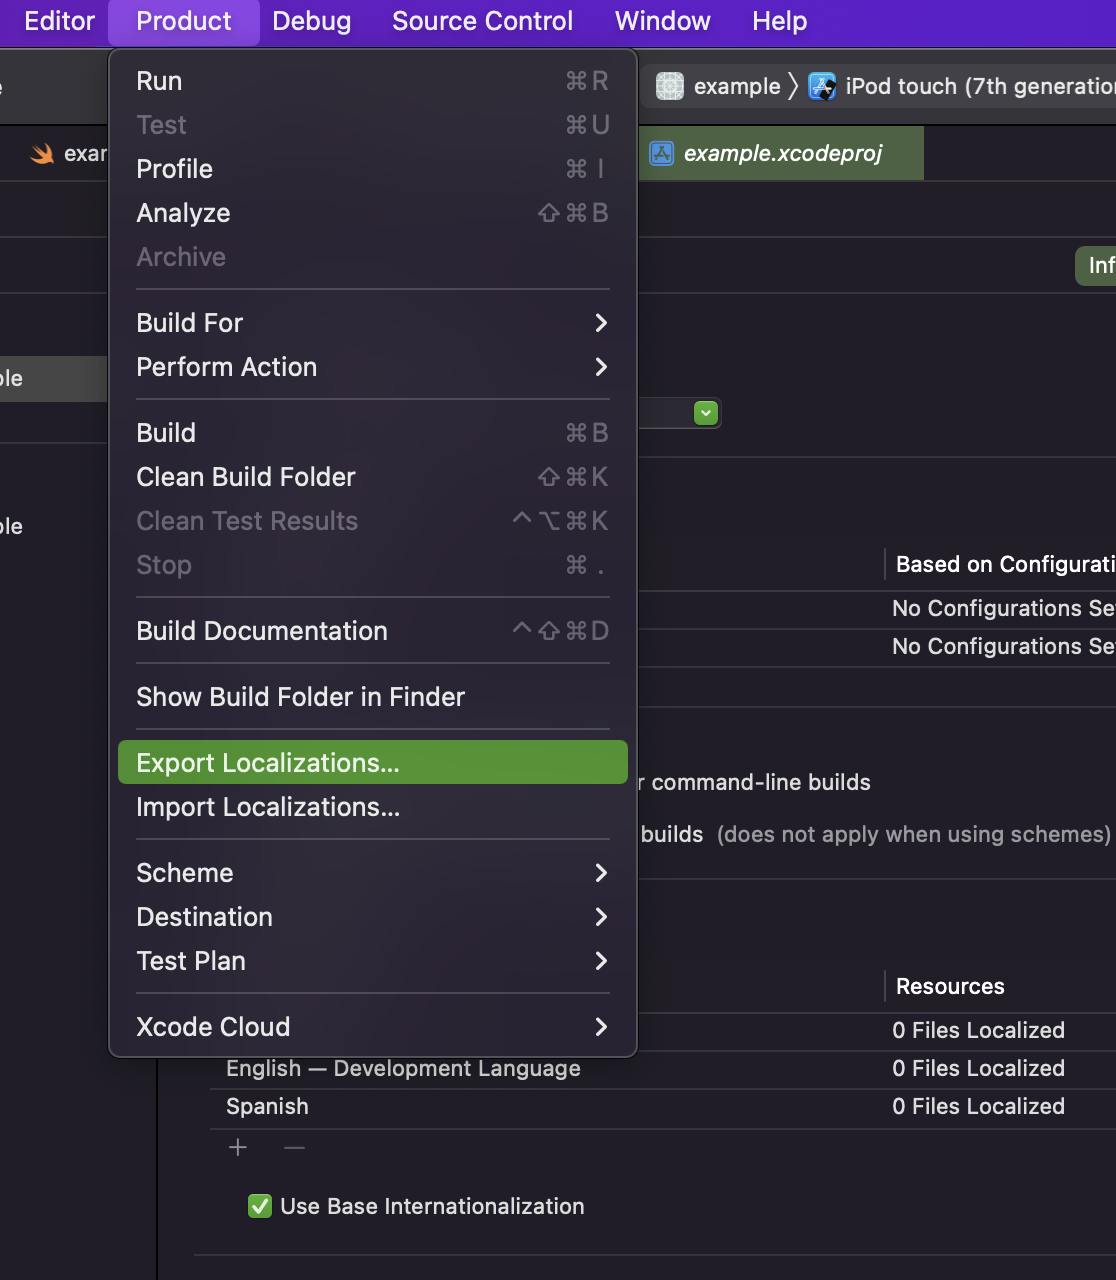
Once you added localization to the project, export localizations by clicking on Product > Export Localizations.

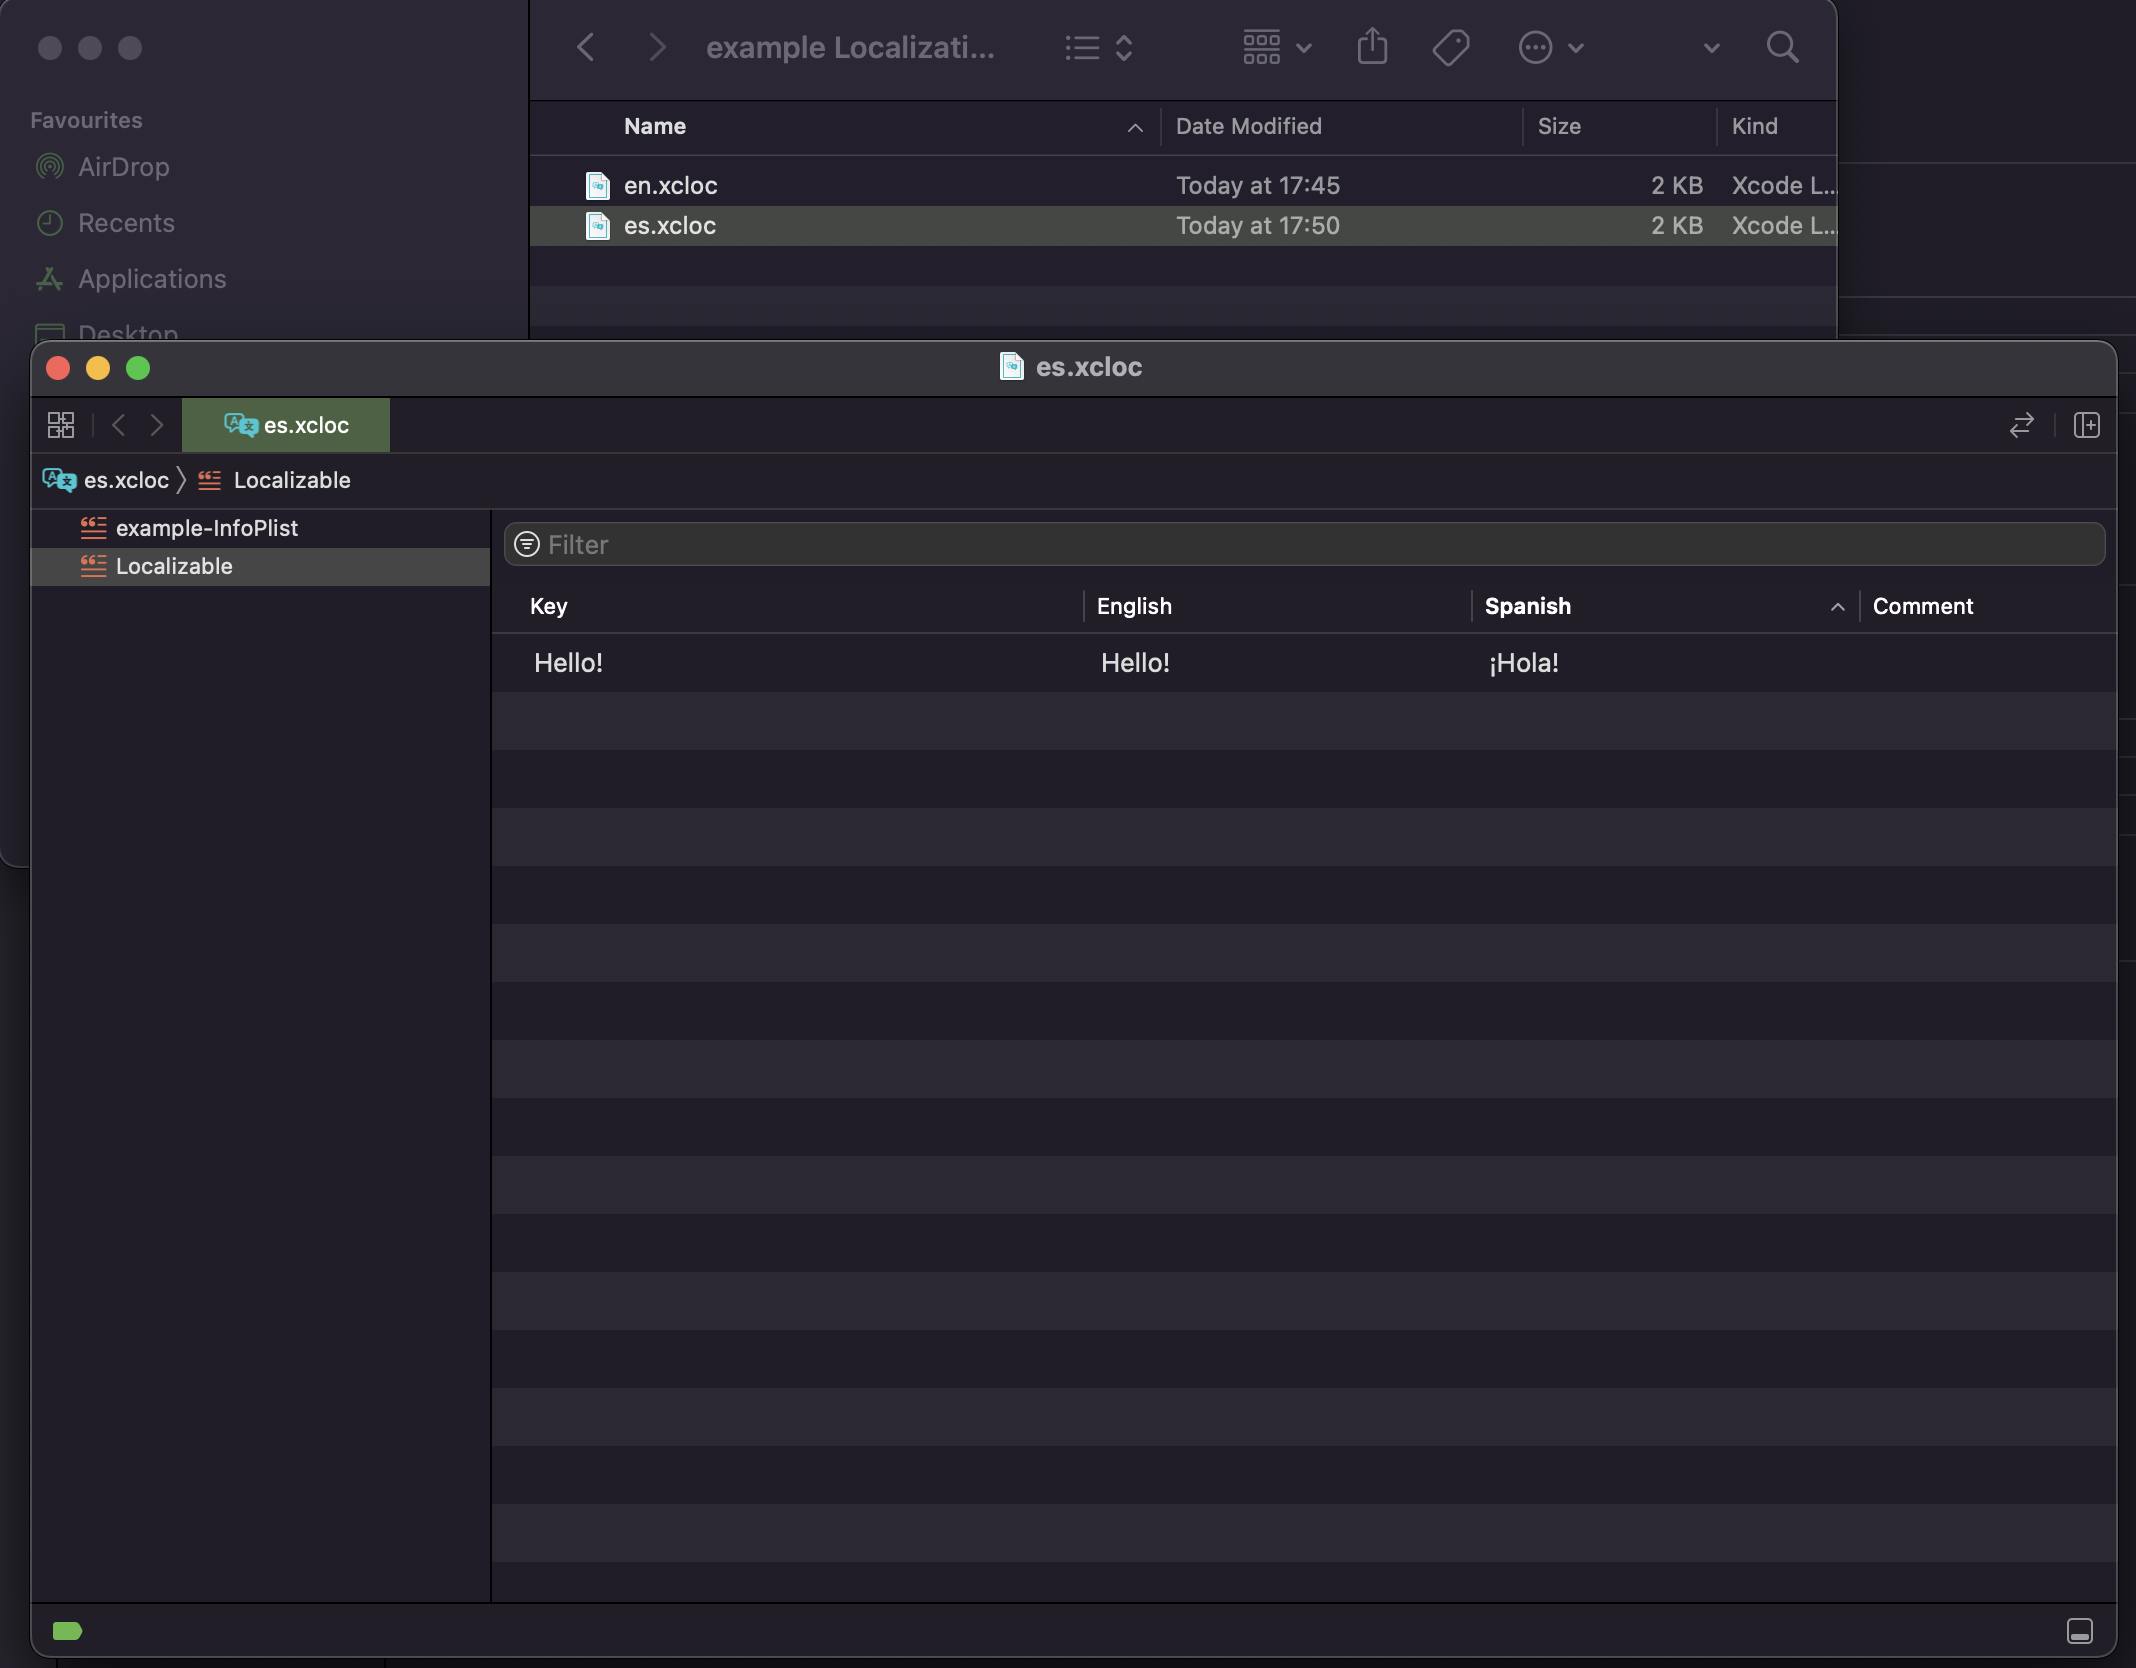
This will create .xcloc files which can be easily opened, by double-clicking on them, and edited using Xcode. When opened, localize your strings to the desired language. Example below for Spanish language:

Note: If Export Localizations is not working properly for you, enable the "Use Compiler to Extract Swift Strings" build setting to extract LocalizedStringKeys from code when exporting for localization in Xcode.
Importing Localizations
Once you are done with translations, importing localizations is as simple as clicking Product > Import Localizations. Select .xcloc files and import them. You should see newly created Localizable.strings in Xcode project navigator which contain key value pairs.

Previewing localizations
Using SwiftUI Previews, it is extremely easy to preview localizations. Example below:
struct ContentView_Previews: PreviewProvider {
    static var previews: some View {
        ContentView()
            .environment(\.locale, .init(identifier: "en"))

        ContentView()
            .environment(\.locale, .init(identifier: "es"))
    }
}
This will create preview which will use desired localization.
Conclusion
Thank you for reading and I hope this article was useful to you! In conclusion, this article went over localizing SwiftUI application, introduction to it and how you can use it in your own projects. If you are interested in finding out more about localizing iOS applications, for example pluralization of strings, consult with references below.
If you like my content and find it useful, please consider following me. If you are feeling extra generous, please consider buying me a coffee.
Connect with me on LinkedIn.
